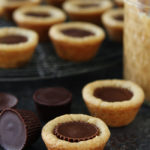
Peanut Butter Cup Cookies
By Maria Lichty
Updated December 08, 2023
Quick Summary
Peanut Butter Cup Cookies-peanut butter cookies made in mini muffin tins with a peanut butter cup in the center. These cookie cups are a family favorite and the perfect cookie for parties and the holidays!
What are your favorite holiday cookies ? I have A LOT of favorites: Andes mint , snickerdoodles , thumbprints , sugar cookies , and chocolate crinkle …just to name a few.
I recently asked you all to send us your all-time favorite cookie recipes and WOW, you guys make some amazing cookies. We were blown away by all of the submissions. THANK YOU! I seriously wanted to make them all.
When I saw Mallory’s recipe for Peanut Butter Cup Cookies, I knew I HAD to make them. I used to make these when I was a kid but haven’t made them in YEARS. I was so happy to see them again…and I couldn’t wait to taste them again:)
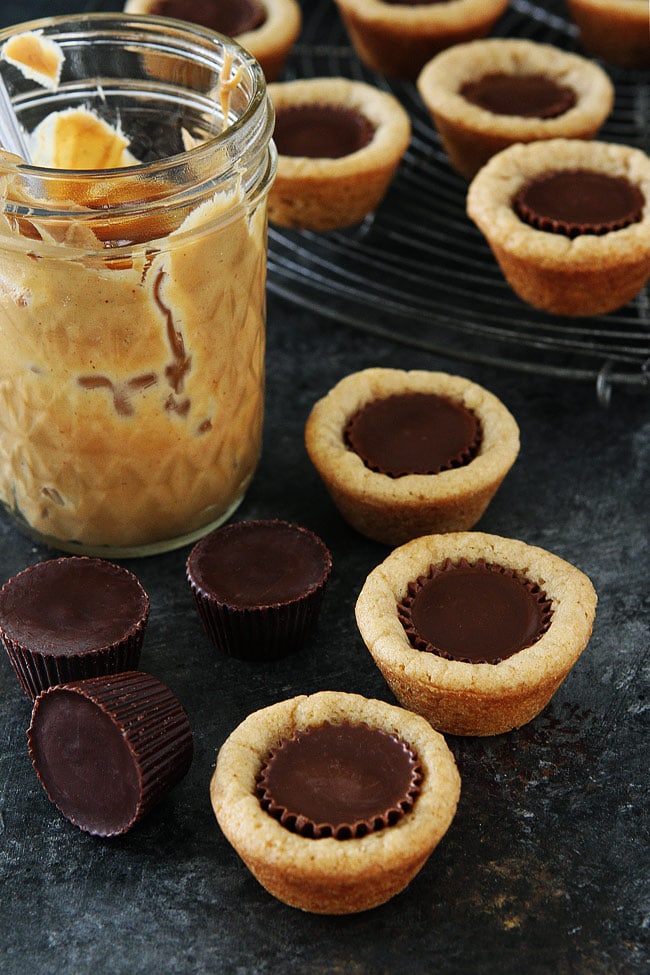
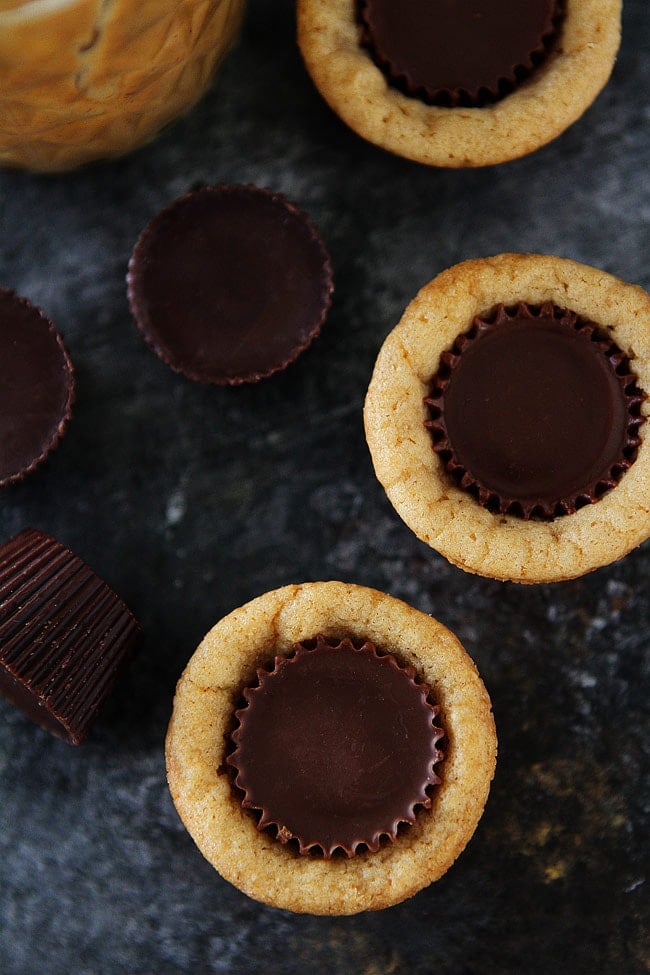
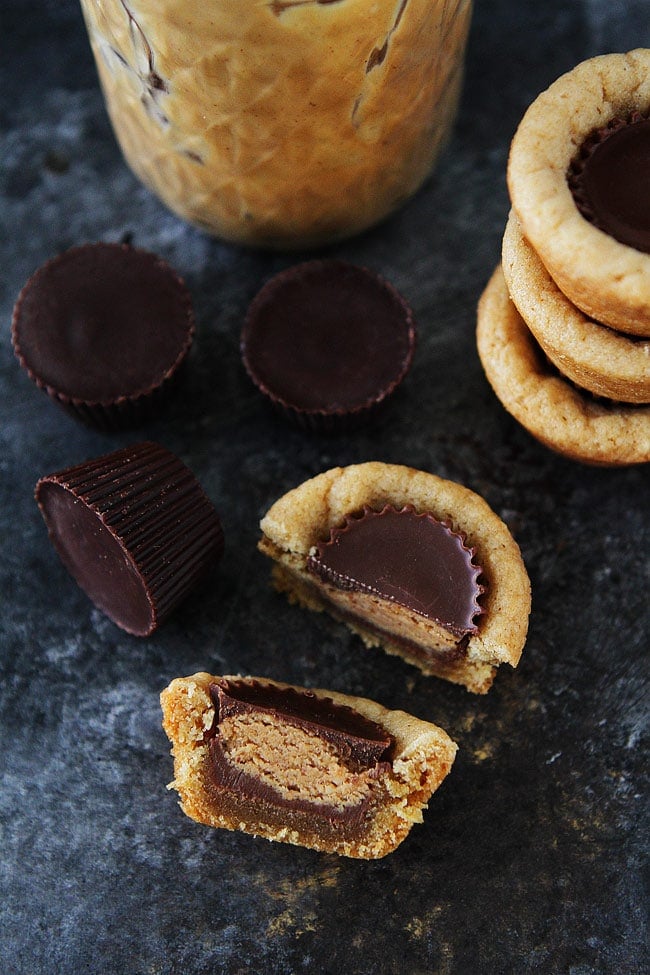
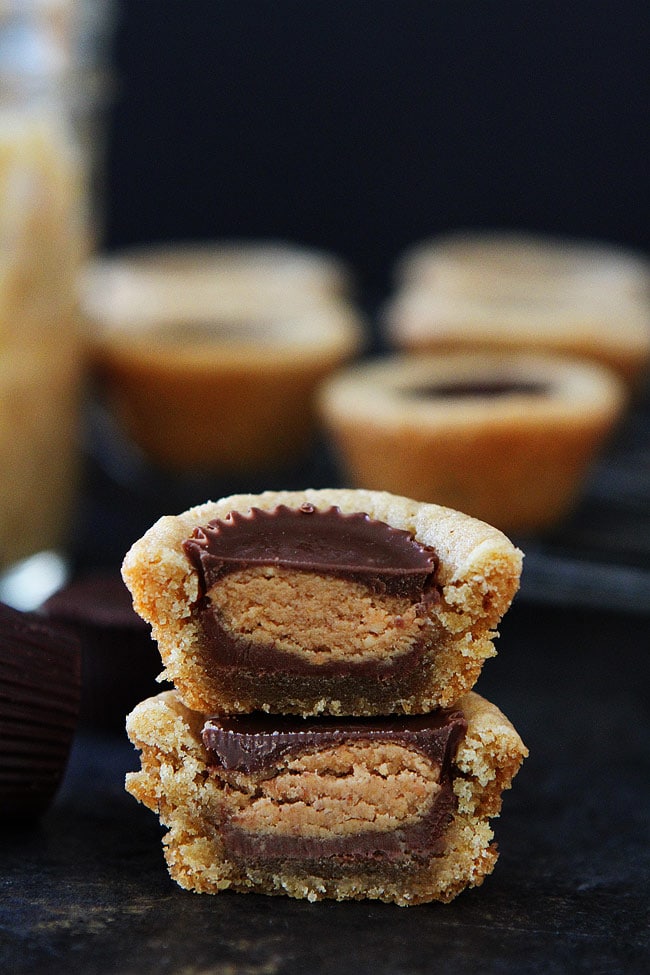
If you haven’t had Peanut Butter Cup Cookies, let me fill you in. They are basically the most dreamy peanut butter cookie ever because they have a peanut butter cup in the center! Peanut butter lovers, these cookies are for YOU!
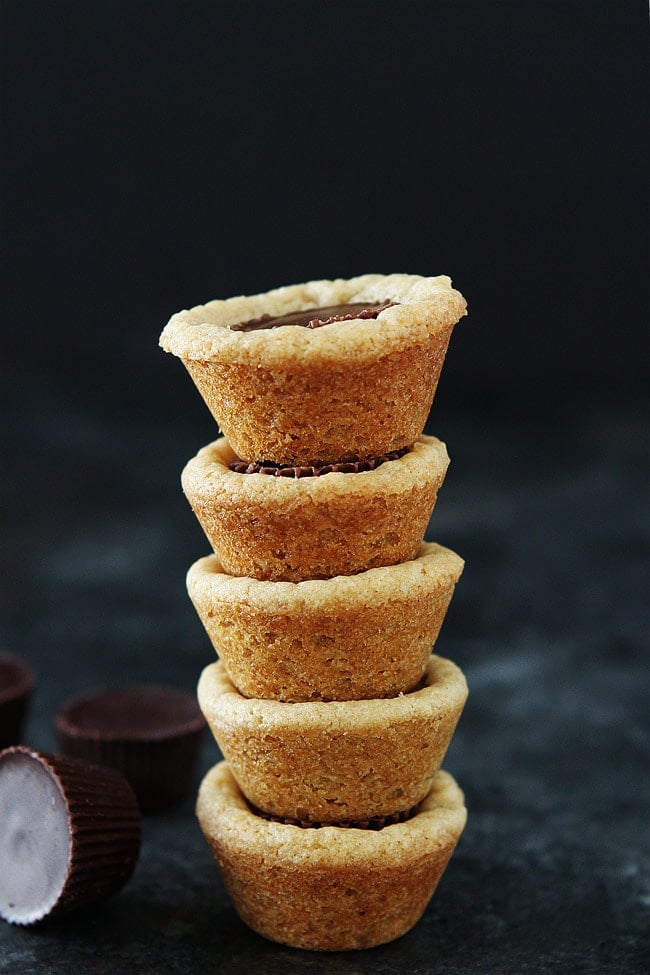
The cookies are also fun to make because they are made in a mini muffin pan ! They are fun to make and fun to eat! These bite size cookies are filled with peanut butter goodness.
Tips for making Peanut Butter Cup Cookies
- Unwrap the peanut butter cups before you start and place them in the freezer. If they are super cold they won’t melt when you push them into the warm peanut butter cookies.
- Use regular creamy peanut butter for this recipe, not natural peanut butter.
- Make sure your egg and milk are at room temperature.
- Don’t overfill the muffin cups. You only need a tablespoon of dough per cookie.
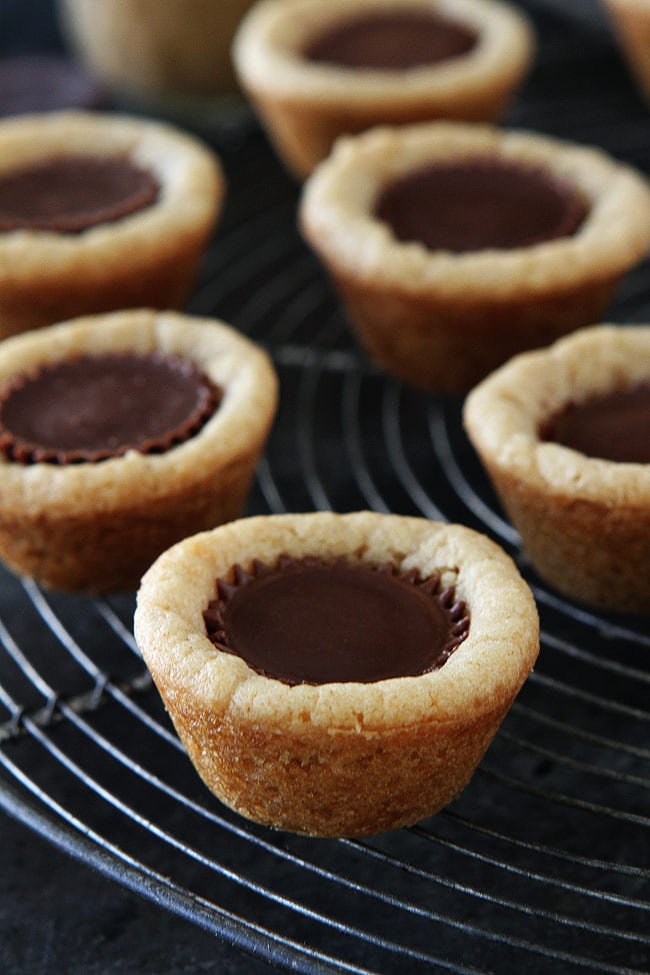
- Don’t over bake. The cookies will continue to cook as they cool in the muffin tin.
- When you remove them from the oven, they will collapse and that is what you want. Push the peanut butter cups into the collapsed center.
- After you push the peanut butter cups into the center of the cookies, place the pan in the refrigerator to chill for 15-20 minutes. This will keep the peanut butter cups from melting and it will be easier to remove them from the pan.
- You can use a butter knife to lift them up and out of the pan if you need to.
- White chocolate peanut butter cups are good in this recipe too.
Ok, are you guys ready to bake Peanut Butter Cup Cookies? They are guaranteed to be a family favorite. The only problem? They never last long, they are TOO good:)
Make a batch to share with your family and friends this holiday season!
More Peanut Butter Cookie Recipes
- Peanut Butter Cookies
- Peanut Butter Chocolate Chip Cookies
- Salted Pretzel Peanut Butter Cup Cookies
- Peanut Butter Oatmeal Cookies
- 3 Ingredient Peanut Butter Cookies
- Peanut Butter Oatmeal Chocolate Chip Cookies
Find MORE cookie recipes HERE and in my cookie cookbook, Let’s Eat Cookies !

Vegetarian
Peanut Butter Cup Cookies
Ingredients1x2x3x
- 40 miniature chocolate covered peanut butter cups unwrapped
- 1 3/4 cups all-purpose flour
- 1/2 teaspoon salt
- 1 teaspoon baking soda
- 1/2 cup unsalted butter softened
- 1/2 cup granulated sugar
- 1/2 cup packed brown sugar
- 1/2 cup creamy peanut butter
- 1 large egg at room temperature
- 1 teaspoon vanilla extract
- 1 tablespoon milk at room temperature
Instructions
- Preheat oven to 350 degrees F. Grease a 24 cup mini muffin pan with nonstick cooking spray. This recipe makes about 40 cookies, so if you have two muffin pans , grease them both. This will speed up the process.
- Place the unwrapped peanut butter cups in the freezer until you are ready to use them.
- In a medium bowl, whisk together the flour, salt and baking soda. Set aside.
- In the bowl of a stand mixer, beat the butter, sugars, and peanut butter together until fluffy and smooth, about 3 minutes.
- Beat in the egg, vanilla and milk. Add the flour mixture; mix until just combined.
- Roll the cookie dough into balls, 1 tablespoon of dough per cookie. The dough will be a little sticky and that’s ok. If it is too sticky, you can chill it in the fridge for 20 minutes. Place each ball into prepared muffin pans.
- Bake for 8-10 minutes, don’t over bake. Remove from oven. The centers will collapse a little and that is ok. Remove the peanut butter cups from the freezer and press a peanut butter cup into each cookie.
- Place the pan in the refrigerator for 15-20 minutes so the cookies can cool. This will keep the peanut butter cups from melting and it will make the easier to remove from the pan.
- When the cookies are completely cool, remove them from the pan and place on a cooling rack.
Have you tried this recipe?
Thumbprint Cookies
By Maria Lichty
Published on December 06, 2022
Quick Summary
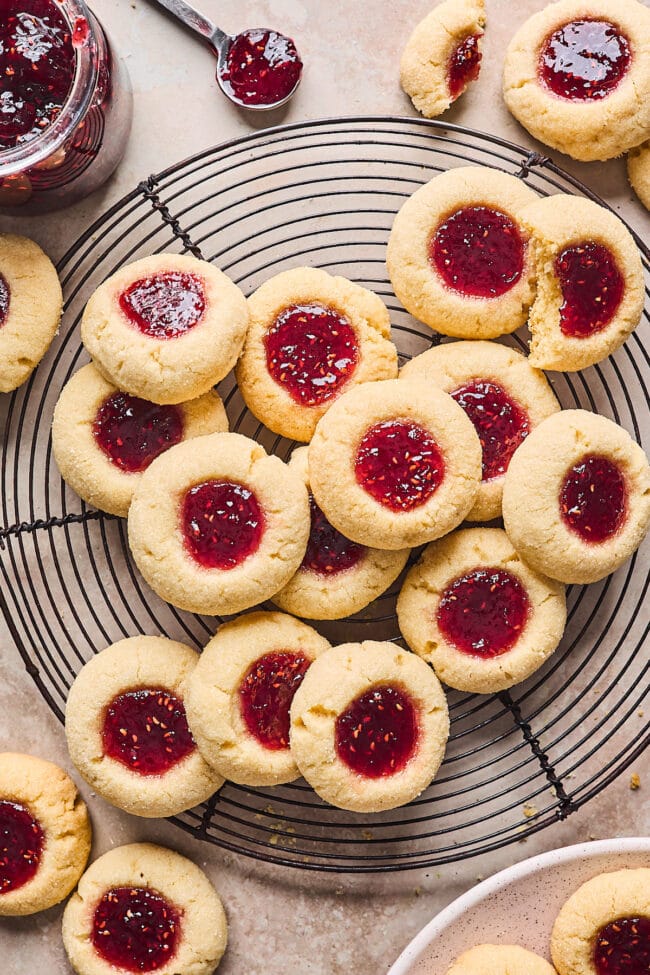
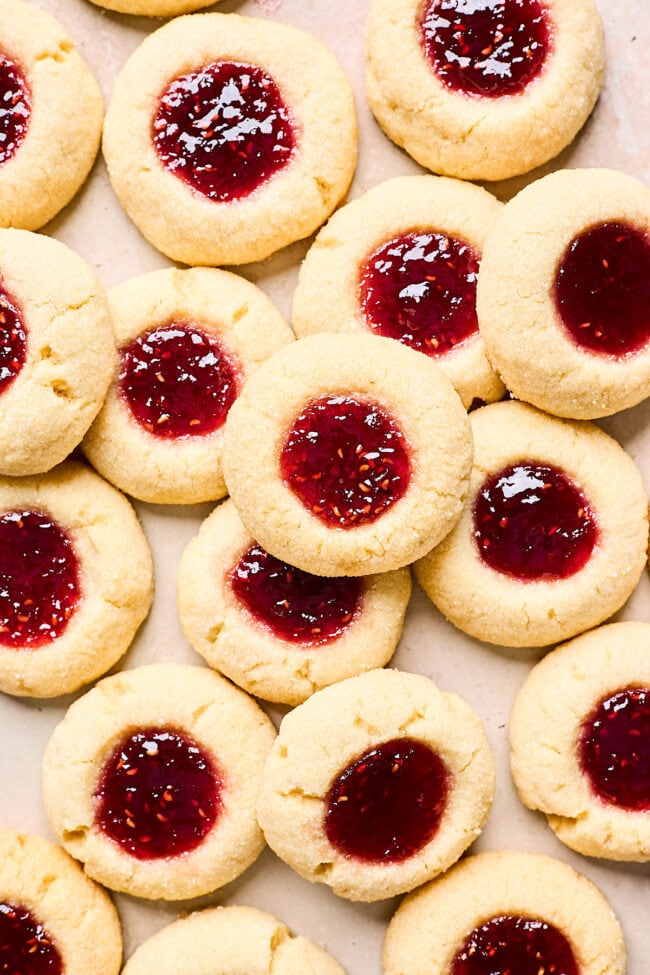
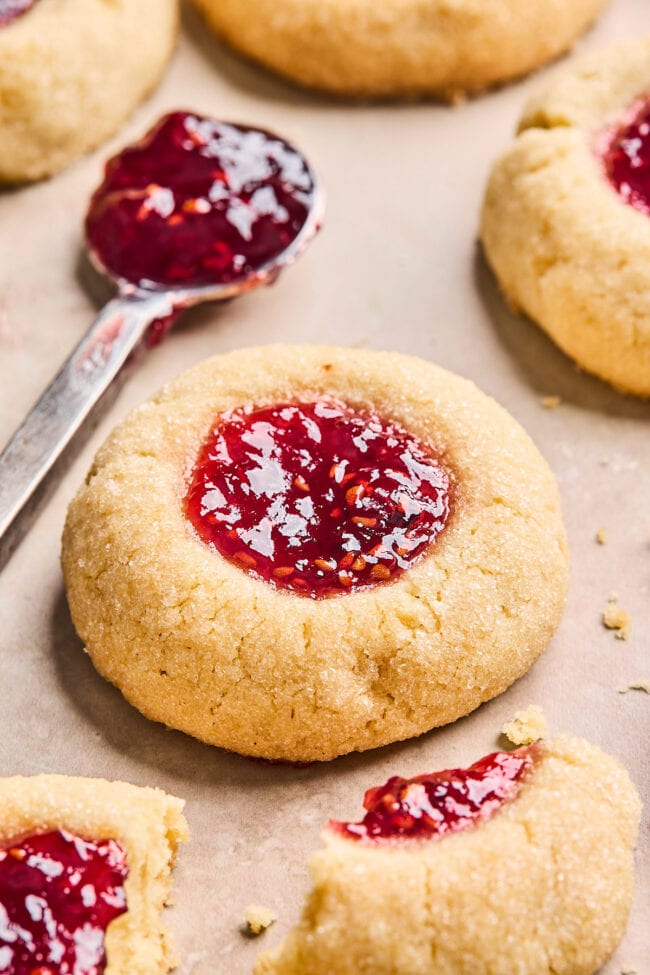
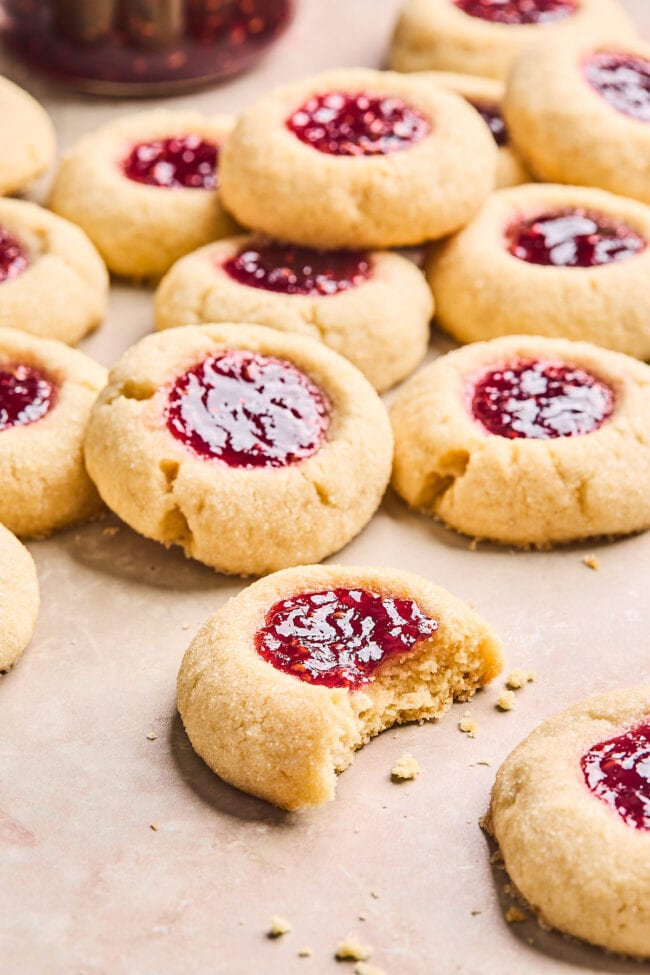
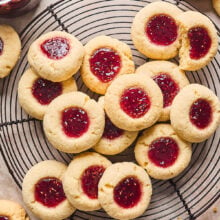
Thumbprint Cookies-buttery shortbread cookies rolled in sugar and filled with sweet raspberry jam! These beautiful little cookies are a classic Christmas cookie, but can be enjoyed anytime of the year.
I love creating new cookie recipes , but I also love the classics. One of our favorite cookies to make at Christmas time are Thumbprint Cookies . They are a holiday favorite and a great addition to any cookie platter.
So what are Thumbprint Cookies? If you haven’t had a jam thumbprint, you are in for a real treat! They are buttery, tender shortbread cookies with a sweet jam center. I like to use raspberry jam because it is sweet, tart, and I love the deep red color. But you can fill the thumbprints with your favorite jam!
They cookies are simple, but elegant and super delicious. You can’t go wrong with a classic!
- Cookie Ingredients
- How to Make Thumbprint Cookies
- How to Store Thumbprint Cookies
- How to Freeze Thumbprint Cookies
- Thumbprint Cookie FAQ
- More Christmas Cookie Recipes
- Jam Thumbprint Cookies Recipe
Cookie Ingredients
Simple ingredients come together to make the most amazing cookies!
- Flour – use all-purpose flour!
- Salt – to bring flavor to the cookies.
- Butter – Use unsalted butter and make sure it isn’t too soft or melted. You want the butter at cool room temperature.
- Sugar – you will need granulated sugar for the cookie dough and for rolling the cookies before baking.
- Brown sugar – I like to use a little brown sugar for flavor and to keep the cookies tender and not dry.
- Egg yolk – an egg yolk creates a rich cookie and holds everything together.
- Vanilla extract – a must! If you like almond extract, you can add ¼ teaspoon to the dough.
- Jam – I prefer raspberry jam, but any flavor will do! Make sure you use a nice, thick jam! Splurge to get a good quality jam since it’s a big part of the cookie! If your jam is SUPER thick, you can put it in a bowl and give it a good stir. If it is still too thick, heat it in the microwave for just a few seconds to loosen it up.

How to Make Thumbprint Cookies
These little gems are easy to make and SO pretty!
- In a medium bowl, whisk together the flour and salt. Set aside.
- Use a stand mixer or hand mixer to beat the butter and sugars together. Scrape down the sides of the bowl with a spatula, as necessary. Add the egg yolk and vanilla extract and mix until well combined.
- Add the dry ingredients and mix on low until just combined. Don’t over mix the dough!
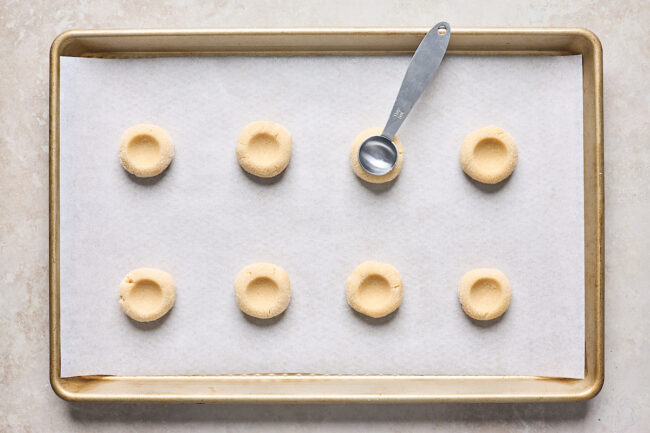
- Roll the dough into balls, about 1 ½ teaspoons per cookie. Place the remaining ½ cup sugar in a small bowl. Roll the balls in the sugar until well coated.
- Place on a baking sheet that has been lined with parchment paper or a Silpat baking mat, you may need 2 sheets.
- Use the rounded back of a teaspoon or your thumb to gently press an indentation in the center each cookie dough ball. Transfer the baking sheet to the freezer and chill for 30 minutes.
- Preheat the oven so it is hot and ready to go!
- Fill a small zipper-lock bag with the jam. Use scissors to snip a small corner off the bag. Carefully fill each indentation with about a ½ teaspoon of jam. Alternatively, you can use a small spoon or teaspoon to fill the centers with jam. Don’t over fill or the jam will ooze out in the oven. Less is best!
- Make sure the cookies are 2-inches apart on the baking sheets. Bake one pan at a time, for 10 to 12 minutes or until the edges are light golden brown.
How to Store Thumbprint Cookies
Store the cooled thumbprint cookies in an airtight container at room temperature on the counter. You don’t have to refrigerate the cookies. I don’t recommend stacking the cookies because of the jam.
These cookies will stay fresh for up to 5 days.
How to Freeze Thumbprint Cookies
If you want to freeze cookies, I recommend freezing the unbaked cookies before adding jam.
Make the cookie dough and form them into thumbprints. Place the cookies on a tray and freeze until firm, about 30 minutes to an hour. Once frozen, transfer the the unbaked cookies to a freezer container or freezer bag and freeze for up to one month.
When ready to bake, preheat the oven and arrange the cookies on the baking sheets. Fill with jam and bake. It’s ok if the cookies are still a little frozen when going into the oven, you might have to add an additional minute to the baking time.
Make sure you use a thick jam and not a runny jam. I prefer raspberry jam, but strawberry, blackberry, apricot, or mixed berry are all good options. Use your favorite flavor.
Yes! If you don’t care for jam, fill the cookies with melted chocolate, lemon curd, salted caramel sauce, marmalade, or Nutella.
Fill the cookies with jam before baking so it can set up in the oven.
Make sure when you are pressing the back of the teaspoon or your thumb into the center of the cookie dough you don’t press too hard. Gently press! If the edges of the cookie start to crack a little, you can gently press it back together.
Make sure your butter isn’t too soft when making the dough. It should be at cool room temperature and not super soft or greasy. Also, don’t make your cookies too big, thumbprints are smaller cookies. And most importantly, make sure you you chill the dough! After you form the cookies, place the unbaked cookies in the freezer for at least 30 minutes before baking. This will prevent them from spreading.
Yes! I recommend freezing the unbaked cookies before you fill them with jam. See above for my tips!
More Christmas Cookie Recipes
- Easy Sugar Cookies
- Peanut Butter Blossoms
- Andes Mint Cookies
- Snickerdoodles
- Chocolate Kiss Cookies
- Mexican Wedding Cookies
Cookies
Jam Thumbprint Cookies
Equipment
- Baking Sheets (I love these cookie sheets !)
- Stand Mixer (I’m obsessed with my KitchenAid)
- Silpat Baking Mat (these prevent cookies from sticking)
Ingredients1x2x3x
- 2 1/4 cups all-purpose flour
- 1/2 teaspoon salt
- 1 cup unsalted butter, at cool room temperature
- 1 cup granulated sugar, divided
- 3 tablespoons light brown sugar
- 1 large egg yolk
- 1 1/2 teaspoons vanilla extract
- 2/3 cup thick raspberry jam, or jam of your choice
Instructions
- In a medium bowl , whisk together the flour and salt. Set aside.
- In the bowl of a stand mixer fitted with the paddle attachment, beat the butter for 1 minute on medium speed. Add ½ cup of the granulated sugar and brown sugar and mix until light and fluffy, about 2 minutes. Scrape down the sides of the bowl with a spatula, as necessary. Add the egg yolk and vanilla extract and mix until well combined.
- Add the dry ingredients and mix on low until just combined.
- Roll the dough into balls, about 1 ½ teaspoons per cookie. Place the remaining ½ cup sugar in a small bowl. Roll the balls in the sugar until well coated.
- Place on a baking sheet that has been lined with parchment paper or a Silpat baking mat , you may need 2 sheets.
- Use the rounded back of a teaspoon or your thumb to gently press an indentation in the center each cookie dough ball. Transfer the baking sheet to the freezer and chill for 30 minutes.
- Preheat the oven to 350 degrees F.
- Fill a small zipper-lock bag with the jam. Use scissors to snip a small corner off the bag. Carefully fill each indentation with about a ½ teaspoon of jam. Don’t over fill or the jam will ooze out in the oven. Less is best!
- Make sure the cookies are 2-inches apart on the baking sheets. Bake one pan at a time, for 10 to 12 minutes or until the edges are light golden brown.
- Remove from the oven and let the cookies cool on the baking sheet. Enjoy!
Nutrition
Have you tried this recipe?
Peanut Butter Cup Cookies
Recipe from Two Peas and Their Pod
Ingredients
- 40 miniature chocolate covered peanut butter cups unwrapped
- 1 3/4 cups all-purpose flour
- 1/2 teaspoon salt
- 1 teaspoon baking soda
- 1/2 cup unsalted butter softened
- 1/2 cup granulated sugar
- 1/2 cup packed brown sugar
- 1/2 cup creamy peanut butter
- 1 large egg at room temperature
- 1 teaspoon vanilla extract
- 1 tablespoon milk at room temperature
Instructions
- Preheat oven to 350 degrees F. Grease a 24 cup mini muffin pan with nonstick cooking spray. This recipe makes about 40 cookies, so if you have two muffin pans , grease them both. This will speed up the process.
- Place the unwrapped peanut butter cups in the freezer until you are ready to use them.
- In a medium bowl, whisk together the flour, salt and baking soda. Set aside.
- In the bowl of a stand mixer, beat the butter, sugars, and peanut butter together until fluffy and smooth, about 3 minutes.
- Beat in the egg, vanilla and milk. Add the flour mixture; mix until just combined.
- Roll the cookie dough into balls, 1 tablespoon of dough per cookie. The dough will be a little sticky and that’s ok. If it is too sticky, you can chill it in the fridge for 20 minutes. Place each ball into prepared muffin pans.
- Bake for 8-10 minutes, don’t over bake. Remove from oven. The centers will collapse a little and that is ok. Remove the peanut butter cups from the freezer and press a peanut butter cup into each cookie.
- Place the pan in the refrigerator for 15-20 minutes so the cookies can cool. This will keep the peanut butter cups from melting and it will make the easier to remove from the pan.
- When the cookies are completely cool, remove them from the pan and place on a cooling rack.
