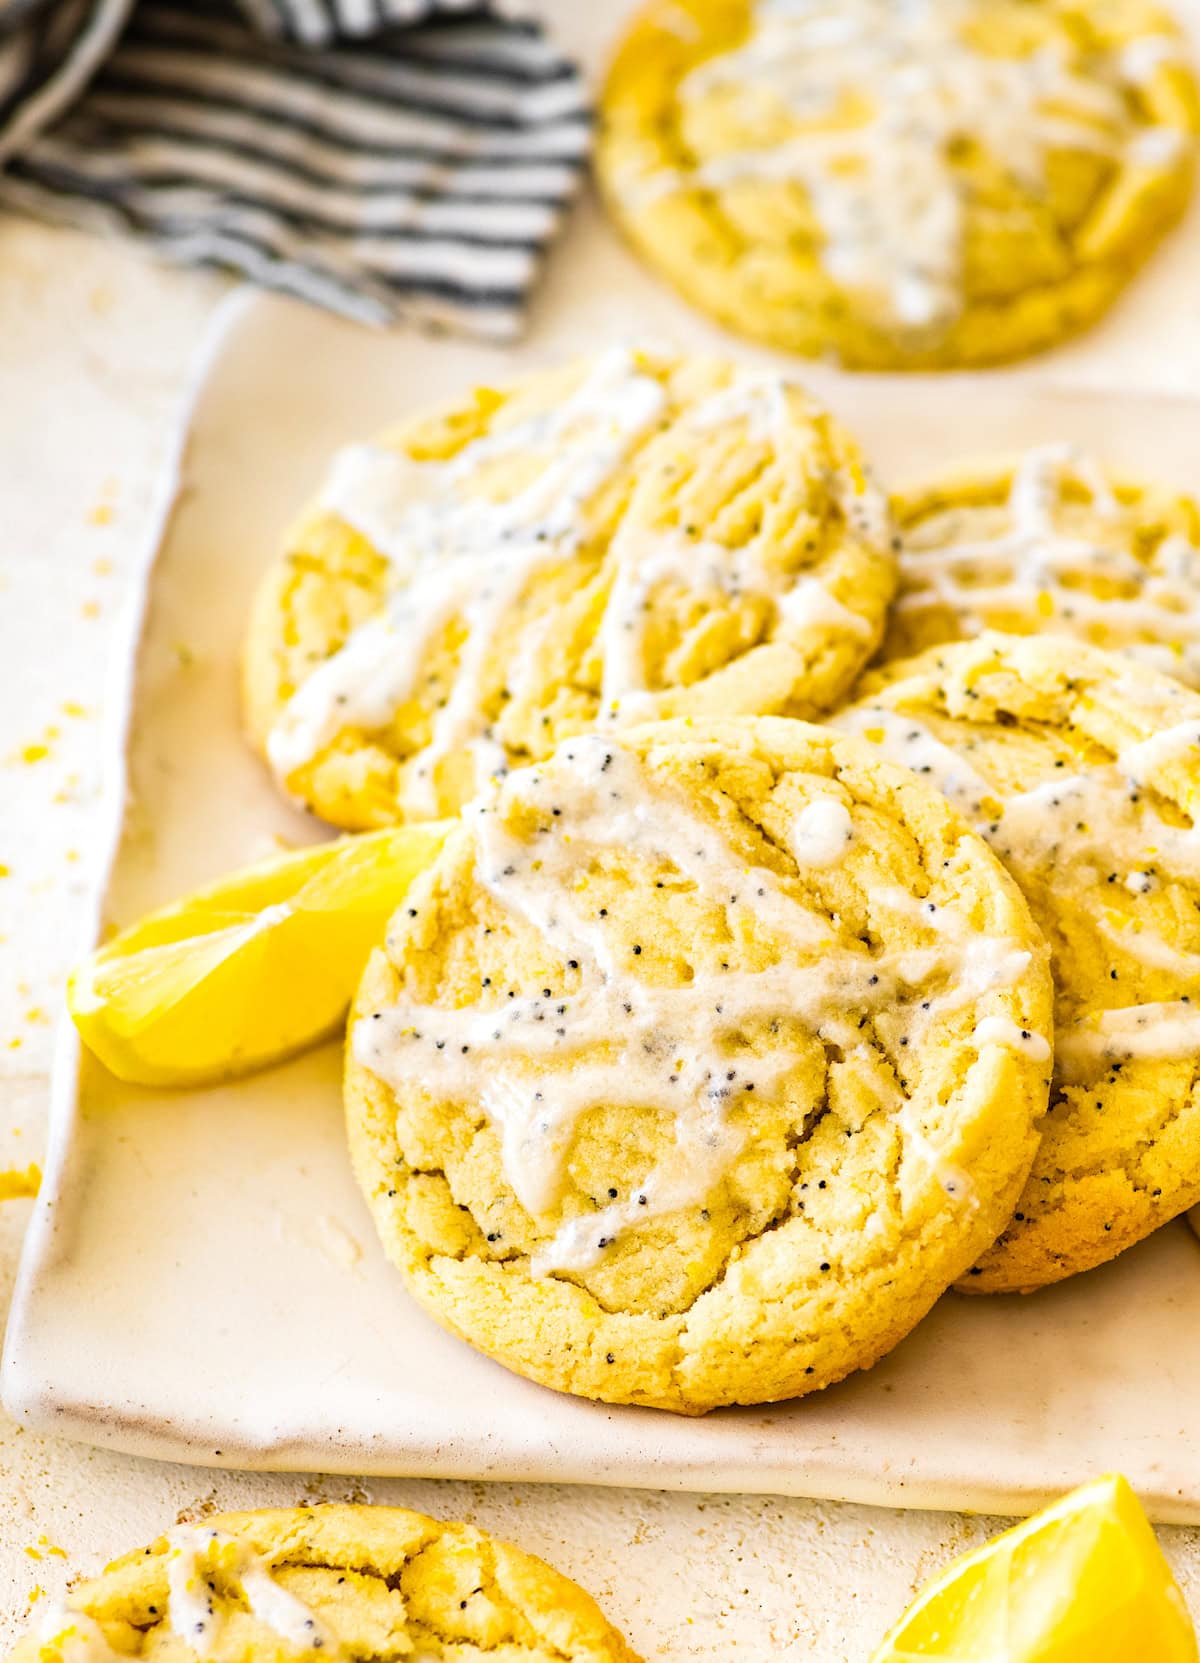
Chewy Lemon Poppy Seed Cookies
By Maria Lichty
Published on June 25, 2025
Quick Summary
These soft and chewy Lemon Poppy Seed Cookies are bursting with bright citrus flavor, a hint of almond, and a touch of crunch from poppy seeds. Topped with a sweet lemon glaze, they’re easy to make with no chilling required—perfect for spring and summer gatherings, or anytime you’re craving a fresh, bakery-style cookie at home.

Pin this now to find it later
The Best Lemon Poppy Seed Cookies – Soft, Chewy, and Glazed to Perfection
If you’ve been baking your way through the cookie recipes on my website or flipping through my cookie cookbook Let’s Eat Cookies , you know one thing for sure—I’m serious about cookies. With hundreds of cookie recipes under my belt, I’ve taste-tested, tweaked, and perfected just about every kind of cookie you can imagine. So when I tell you that these Lemon Poppy Seed Cookies are amazing , I mean it.
These cookies are soft, chewy, and absolutely bursting with bright, fresh lemon flavor. A hint of almond extract gives them a subtle bakery-style edge, and the poppy seeds add the perfect little crunch in every bite. They’re finished with a sweet lemon glaze that makes them look as good as they taste (which is saying something!).
They’re a total crowd-pleaser—whether you’re baking them for a baby shower, bridal brunch, summer picnic, or just because you need a lemony treat. In fact, these are my oldest son’s all-time favorite cookie —and that’s saying something in our cookie-loving household!
Even better? You don’t have to chill the dough. Just mix, scoop, bake, and glaze. Easy, breezy, lemon-squeezy!
Ingredients You’ll Need
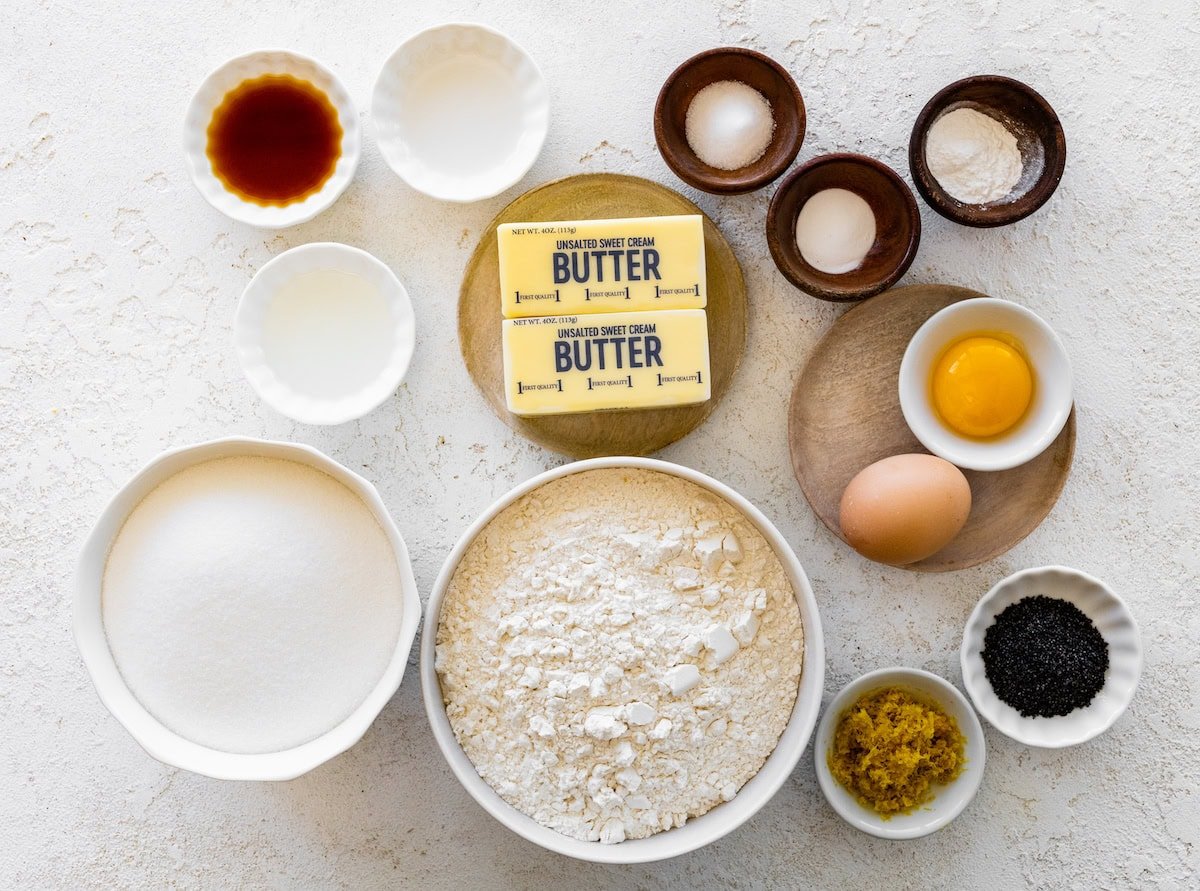
- Unsalted butter : I use unsalted butter so I can control the amount of salt in the recipe. Make sure the butter is at room temperature so it creams easily with the sugar.
- Granulated sugar : Sweetens the dough and helps create those irresistibly chewy edges.
- Lemon zest : Packs a punch of lemon flavor!
- Egg + egg yolk : The extra yolk adds richness and makes the cookies ultra-chewy and soft in the center.
- Lemon extract : It enhances the lemon flavor in the cookie. Look for it in the baking aisle by the vanilla extract.
- Vanilla & Almond extract : Vanilla is always a must and the almond extract adds a subtle nutty flavor that pairs beautifully with lemon.
- All-purpose flour : The perfect base to give the cookies structure without making them dense.
- Baking powder & Baking Soda : The combo gives the cookies just the right lift while keeping the centers thick and chewy.
- Salt : Balances the sweetness and enhances all the other flavors.
- Poppy seeds : Add a bit of texture and visual flair; don’t skip them!
- For the glaze: You will need confectioner’s sugar, lemon juice, vanilla extract, and almond extract! Makes a smooth, sweet, citrusy glaze!
Tips for Perfect Lemon Poppy Seed Cookies
- Rub the lemon zest & sugar together – Before adding the butter, use your fingers to rub the zest into the sugar until it’s fragrant and slightly damp. This releases the lemon’s natural oils and boosts the flavor in every bite.
- Measure your flour correctly – Always fluff the flour first, then spoon it into your measuring cup and level it off with a knife. Never scoop or pack it in—packed flour leads to dry, puffy cookies.
- Use fresh lemons – Fresh zest and juice (for the glaze) give a much brighter, cleaner flavor than bottled options.
- Zest before you juice – It’s much easier to zest a whole lemon than a squeezed one!
- Don’t over bake – The cookies should be just barely golden on the edges and soft in the center. They’ll continue to set as they cool.
- Glaze when cooled – Let the cookies cool completely before glazing, or the glaze will melt and soak into the cookie instead of setting on top.

Cookies
Chewy Lemon Poppy Seed Cookies
Ingredients1x2x3x
For the Cookies:
- 2 3/4 cups all-purpose flour, spooned and leveled
- 1 teaspoon baking powder
- 3/4 teaspoon salt
- 1/2 teaspoon baking soda
- 1 3/4 cups granulated sugar
- 1 tablespoon lemon zest
- 1 cup unsalted butter, at cool room temperature
- 1 large egg
- 1 large egg yolk
- 1 teaspoon pure vanilla extract
- 1 teaspoon lemon extract
- 1/2 teaspoon almond extract
- 1 tablespoon poppy seeds
For the Glaze:
- 1 cups confectioner’s sugar
- 1 1/2 tablespoons fresh lemon juice
- 1 tablespoon unsalted butter, melted
- 1/2 teaspoon almond extract
- 1/2 teaspoon poppy seeds
Instructions
- Preheat oven to 350 degrees F. Line a large baking sheet with parchment paper or a silicone baking mat and set aside.
- In a medium bowl, whisk together the flour, baking powder, salt, and baking soda. Set aside.
- In a small bowl, combine the sugar and lemon zest. Rub together with your fingers until fragrant.
- In the bowl of a stand mixer fitted with the paddle attachment, beat the butter and sugar mixture together until creamy and smooth, about 2 minutes, scraping down the sides of the bowl with a spatula, as necessary. Add the egg and egg yolk and mix until combined. Mix in the vanilla, lemon, and almond extracts.
- With the mixer off, add the dry ingredients. Mix on low until just combined. Don’t over mix. Stir in the poppy seeds.
- Roll or scoop the dough into balls, 1 ½ tablespoons per cookie, and place them on the prepared baking sheet, 2-inches apart.
- Bake for 10 to 12 minutes or until the cookies are set around the edges, but still soft in the center. Let the cookies cool on the baking sheet for about 5 minutes. Transfer to a wire cooling rack and cool completely.
- While the cookies are cooling, make the glaze. In a medium bowl, whisk together the confectioner’s sugar, lemon juice, melted butter, almond extract, and poppy seeds.
- Use a spoon to lightly drizzle the glaze over the cooled cookies. Let the glaze set up and enjoy!
Notes
Nutrition
Have you tried this recipe?
More Cookie Recipes
- Glazed Lemon Cookies
- Lemon Sugar Cookies
- Lemon Raspberry Cookies
- Easy Sugar Cookies
- Thumbprint Cookies
Chewy Lemon Poppy Seed Cookies
Recipe from Two Peas and Their Pod
Ingredients
For the Cookies:
- 2 3/4 cups all-purpose flour, spooned and leveled
- 1 teaspoon baking powder
- 3/4 teaspoon salt
- 1/2 teaspoon baking soda
- 1 3/4 cups granulated sugar
- 1 tablespoon lemon zest
- 1 cup unsalted butter, at cool room temperature
- 1 large egg
- 1 large egg yolk
- 1 teaspoon pure vanilla extract
- 1 teaspoon lemon extract
- 1/2 teaspoon almond extract
- 1 tablespoon poppy seeds
For the Glaze:
- 1 cups confectioner’s sugar
- 1 1/2 tablespoons fresh lemon juice
- 1 tablespoon unsalted butter, melted
- 1/2 teaspoon almond extract
- 1/2 teaspoon poppy seeds
Instructions
- Preheat oven to 350 degrees F. Line a large baking sheet with parchment paper or a silicone baking mat and set aside.
- In a medium bowl, whisk together the flour, baking powder, salt, and baking soda. Set aside.
- In a small bowl, combine the sugar and lemon zest. Rub together with your fingers until fragrant.
- In the bowl of a stand mixer fitted with the paddle attachment, beat the butter and sugar mixture together until creamy and smooth, about 2 minutes, scraping down the sides of the bowl with a spatula, as necessary. Add the egg and egg yolk and mix until combined. Mix in the vanilla, lemon, and almond extracts.
- With the mixer off, add the dry ingredients. Mix on low until just combined. Don’t over mix. Stir in the poppy seeds.
- Roll or scoop the dough into balls, 1 1/2 tablespoons per cookie, and place them on the prepared baking sheet, 2-inches apart.
- Bake for 10 to 12 minutes or until the cookies are set around the edges, but still soft in the center. Let the cookies cool on the baking sheet for about 5 minutes. Transfer to a wire cooling rack and cool completely.
- While the cookies are cooling, make the glaze. In a medium bowl, whisk together the confectioner’s sugar, lemon juice, melted butter, almond extract, and poppy seeds.
- Use a spoon to lightly drizzle the glaze over the cooled cookies. Let the glaze set up and enjoy!
Notes
Nutrition
Thumbprint Cookies
By Maria Lichty
Published on December 06, 2022
Quick Summary
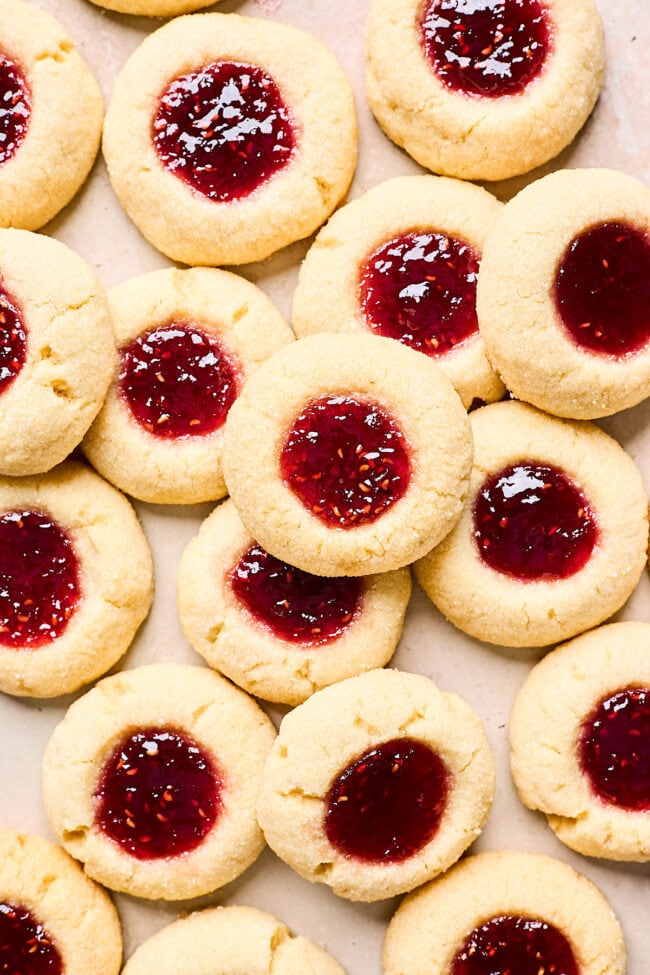
Thumbprint Cookies-buttery shortbread cookies rolled in sugar and filled with sweet raspberry jam! These beautiful little cookies are a classic Christmas cookie, but can be enjoyed anytime of the year.
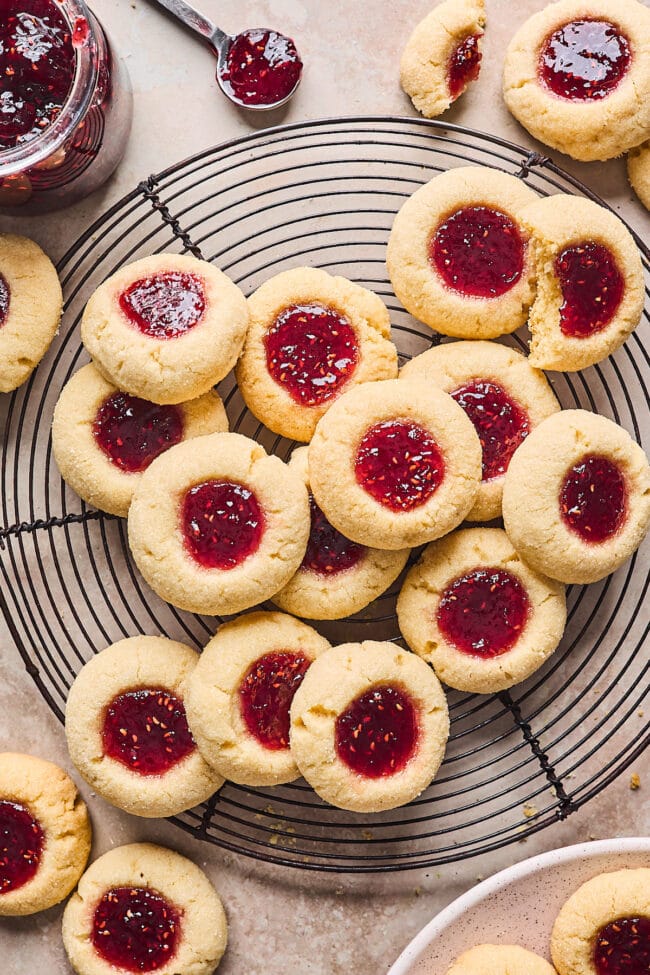
I love creating new cookie recipes , but I also love the classics. One of our favorite cookies to make at Christmas time are Thumbprint Cookies . They are a holiday favorite and a great addition to any cookie platter.
So what are Thumbprint Cookies? If you haven’t had a jam thumbprint, you are in for a real treat! They are buttery, tender shortbread cookies with a sweet jam center. I like to use raspberry jam because it is sweet, tart, and I love the deep red color. But you can fill the thumbprints with your favorite jam!
They cookies are simple, but elegant and super delicious. You can’t go wrong with a classic!
- Cookie Ingredients
- How to Make Thumbprint Cookies
- How to Store Thumbprint Cookies
- How to Freeze Thumbprint Cookies
- Thumbprint Cookie FAQ
- More Christmas Cookie Recipes
- Jam Thumbprint Cookies Recipe
Cookie Ingredients
Simple ingredients come together to make the most amazing cookies!
- Flour – use all-purpose flour!
- Salt – to bring flavor to the cookies.
- Butter – Use unsalted butter and make sure it isn’t too soft or melted. You want the butter at cool room temperature.
- Sugar – you will need granulated sugar for the cookie dough and for rolling the cookies before baking.
- Brown sugar – I like to use a little brown sugar for flavor and to keep the cookies tender and not dry.
- Egg yolk – an egg yolk creates a rich cookie and holds everything together.
- Vanilla extract – a must! If you like almond extract, you can add ¼ teaspoon to the dough.
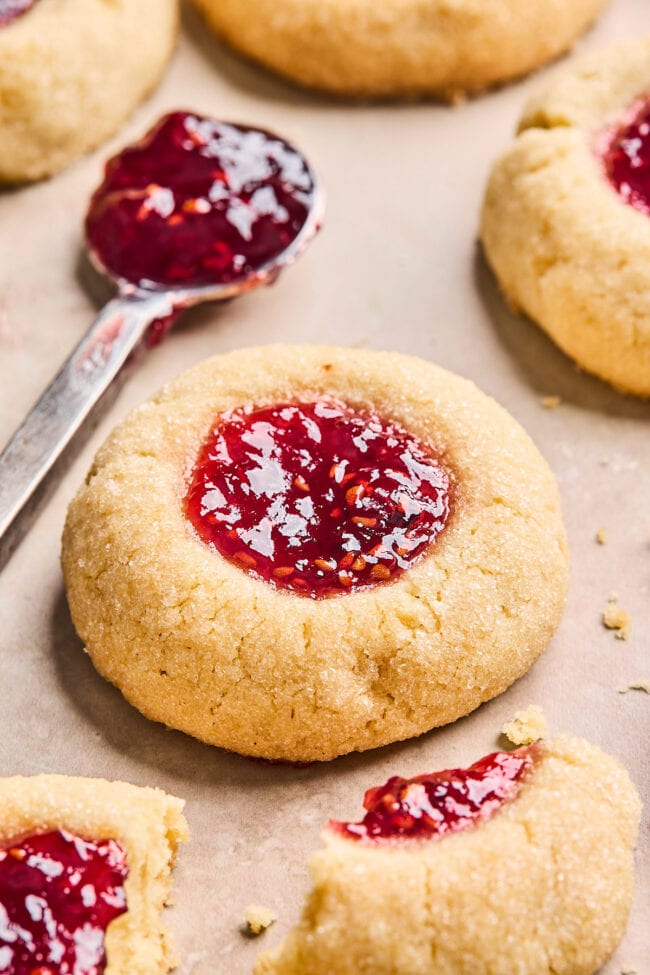
- Jam – I prefer raspberry jam, but any flavor will do! Make sure you use a nice, thick jam! Splurge to get a good quality jam since it’s a big part of the cookie! If your jam is SUPER thick, you can put it in a bowl and give it a good stir. If it is still too thick, heat it in the microwave for just a few seconds to loosen it up.

How to Make Thumbprint Cookies
These little gems are easy to make and SO pretty!
- In a medium bowl, whisk together the flour and salt. Set aside.
- Use a stand mixer or hand mixer to beat the butter and sugars together. Scrape down the sides of the bowl with a spatula, as necessary. Add the egg yolk and vanilla extract and mix until well combined.
- Add the dry ingredients and mix on low until just combined. Don’t over mix the dough!
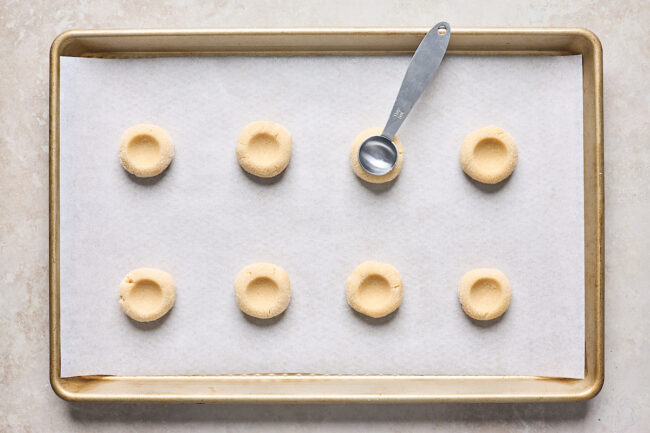
- Roll the dough into balls, about 1 ½ teaspoons per cookie. Place the remaining ½ cup sugar in a small bowl. Roll the balls in the sugar until well coated.
- Place on a baking sheet that has been lined with parchment paper or a Silpat baking mat, you may need 2 sheets.
- Use the rounded back of a teaspoon or your thumb to gently press an indentation in the center each cookie dough ball. Transfer the baking sheet to the freezer and chill for 30 minutes.
- Preheat the oven so it is hot and ready to go!
- Fill a small zipper-lock bag with the jam. Use scissors to snip a small corner off the bag. Carefully fill each indentation with about a ½ teaspoon of jam. Alternatively, you can use a small spoon or teaspoon to fill the centers with jam. Don’t over fill or the jam will ooze out in the oven. Less is best!
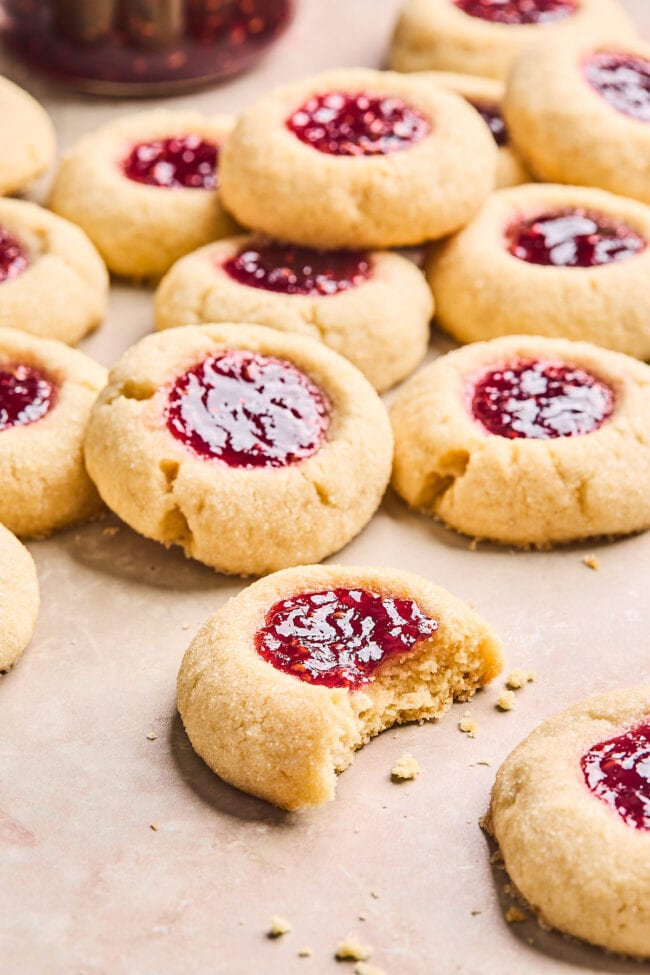
- Make sure the cookies are 2-inches apart on the baking sheets. Bake one pan at a time, for 10 to 12 minutes or until the edges are light golden brown.
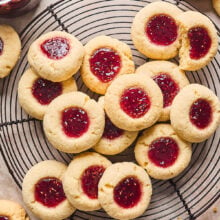
How to Store Thumbprint Cookies
Store the cooled thumbprint cookies in an airtight container at room temperature on the counter. You don’t have to refrigerate the cookies. I don’t recommend stacking the cookies because of the jam.
These cookies will stay fresh for up to 5 days.
How to Freeze Thumbprint Cookies
If you want to freeze cookies, I recommend freezing the unbaked cookies before adding jam.
Make the cookie dough and form them into thumbprints. Place the cookies on a tray and freeze until firm, about 30 minutes to an hour. Once frozen, transfer the the unbaked cookies to a freezer container or freezer bag and freeze for up to one month.
When ready to bake, preheat the oven and arrange the cookies on the baking sheets. Fill with jam and bake. It’s ok if the cookies are still a little frozen when going into the oven, you might have to add an additional minute to the baking time.
Make sure you use a thick jam and not a runny jam. I prefer raspberry jam, but strawberry, blackberry, apricot, or mixed berry are all good options. Use your favorite flavor.
Yes! If you don’t care for jam, fill the cookies with melted chocolate, lemon curd, salted caramel sauce, marmalade, or Nutella.
Fill the cookies with jam before baking so it can set up in the oven.
Make sure when you are pressing the back of the teaspoon or your thumb into the center of the cookie dough you don’t press too hard. Gently press! If the edges of the cookie start to crack a little, you can gently press it back together.
Make sure your butter isn’t too soft when making the dough. It should be at cool room temperature and not super soft or greasy. Also, don’t make your cookies too big, thumbprints are smaller cookies. And most importantly, make sure you you chill the dough! After you form the cookies, place the unbaked cookies in the freezer for at least 30 minutes before baking. This will prevent them from spreading.
Yes! I recommend freezing the unbaked cookies before you fill them with jam. See above for my tips!
More Christmas Cookie Recipes
- Easy Sugar Cookies
- Peanut Butter Blossoms
- Andes Mint Cookies
- Snickerdoodles
- Chocolate Kiss Cookies
- Mexican Wedding Cookies
Cookies
Jam Thumbprint Cookies
Equipment
- Baking Sheets (I love these cookie sheets !)
- Stand Mixer (I’m obsessed with my KitchenAid)
- Silpat Baking Mat (these prevent cookies from sticking)
Ingredients1x2x3x
- 2 1/4 cups all-purpose flour
- 1/2 teaspoon salt
- 1 cup unsalted butter, at cool room temperature
- 1 cup granulated sugar, divided
- 3 tablespoons light brown sugar
- 1 large egg yolk
- 1 1/2 teaspoons vanilla extract
- 2/3 cup thick raspberry jam, or jam of your choice
Instructions
- In a medium bowl , whisk together the flour and salt. Set aside.
- In the bowl of a stand mixer fitted with the paddle attachment, beat the butter for 1 minute on medium speed. Add ½ cup of the granulated sugar and brown sugar and mix until light and fluffy, about 2 minutes. Scrape down the sides of the bowl with a spatula, as necessary. Add the egg yolk and vanilla extract and mix until well combined.
- Add the dry ingredients and mix on low until just combined.
- Roll the dough into balls, about 1 ½ teaspoons per cookie. Place the remaining ½ cup sugar in a small bowl. Roll the balls in the sugar until well coated.
- Place on a baking sheet that has been lined with parchment paper or a Silpat baking mat , you may need 2 sheets.
- Use the rounded back of a teaspoon or your thumb to gently press an indentation in the center each cookie dough ball. Transfer the baking sheet to the freezer and chill for 30 minutes.
- Preheat the oven to 350 degrees F.
- Fill a small zipper-lock bag with the jam. Use scissors to snip a small corner off the bag. Carefully fill each indentation with about a ½ teaspoon of jam. Don’t over fill or the jam will ooze out in the oven. Less is best!
- Make sure the cookies are 2-inches apart on the baking sheets. Bake one pan at a time, for 10 to 12 minutes or until the edges are light golden brown.
- Remove from the oven and let the cookies cool on the baking sheet. Enjoy!
Nutrition
Have you tried this recipe?
